Shooting on RED: My First Time


First times are a funny thing.
First times are a funny thing.
Rarely do people remember the second time they rode a bike without stabilisers, or the seventh time they fell from a climbing frame. People remember firsts, whether we like to or not…
There’s the anticipation of the first time: the apprehension, the excitement, the nerves, the fear.
There’s the first time itself, unfolding in slow motion and forever burnt into our memories (to be accidentally recalled at the most inappropriate moments).
Then there’s the aftermath.
The resulting positive or negative reinforcement that colours your approach to said activity for the remainder of your days (until you opt for expensive therapy…). I digress.
The reason for this preamble is that I’ve experienced all the stages of a first time spread out over the last few months, as I finally made the decision to shoot a paid project on RED instead of ARRI.
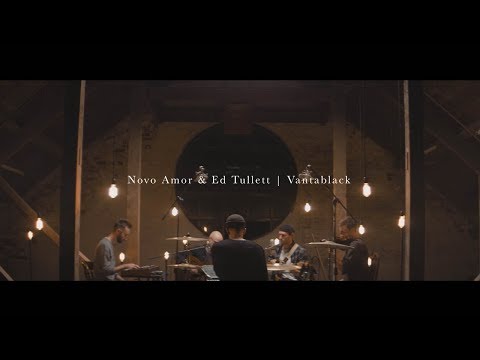
The first time I shot on ARRI was for Novo Amor’s “Alps” video in 2016 and funnily enough, I decided that a couple of live music sessions for Novo Amor & Ed Tullett would be the job to take my RED virginity.
I hope that by breaking down my experience into the three stages I described above, you’ll be able to get an insight into the process leading up to my decision, the shoot itself, and my thoughts and reactions following it.
Buckle up.
ARRI vs. RED
The first time I’d ever picked up an Alexa Mini was the day prior to the shoot, whereby I basically button-bashed my way through the menu system to get to grips with the camera. I’d done some reading regarding exposing for Log-C, and that was it.
I guess that is one of the two major appeals of shooting on ARRI. Aside from it’s exceptionally well developed OLPF (providing the “filmic” look), the reason why DPs worldwide still defend the Alexa to the death—despite its relatively poor resolution (nowhere near true 4K, making it technically exempt from Netflix and Amazon acceptance)—is its ease of use.
Regardless of the complex electronics and computations happening within, the camera is no harder to use than a washing machine.
People don’t like to be made to feel stupid by technology, especially those with delicate egos. When you shoot on ARRI, it makes you feel smart.
In my opinion it’s this factor over anything else that has given ARRI’s Alexa product line the seven year lifespan that it’s enjoyed since 2010.
This is not the case with today’s RED cameras.
You can almost make comparisons between the age old Mac vs. PC debate.
Mac users will tell you that they bought into Apple because they just want to get on with their work without having to have a degree in IT to get the most out of their computer.
PC users exclaim that they enjoy knowing what’s going on under the bonnet, and pride themselves in their knowledge and abilities to fix any problems and customise their computer to suit their specific needs.
Many ARRI lovers will argue that their job is to worry about capturing the story unfolding in front of them, not about the internal workings of the metal box on their shoulder.
RED users will argue that, to get the best possible images in a given situation, you must truly understand the tool and its capabilities.
From my experience, this is true throughout the RED product line, as well as the cameras themselves.
Everything about RED seems to challenge your understanding of filmmaking and camera technologies.
Almost as if spending the time to learn enough to choose and use the correct camera for the job is part of a right of passage.
The “to learn” tick list is daunting from the get go: multiple camera build options, versions of those build options with interchangeable sensors and OLPFs, a plethora of colour sciences and spaces to choose from, an array of RAW compressions to consider, as well as navigating the frequently changing menu system. *gasps for breath*

1. Pre Production
It’s for the reasons above that I approached shooting on RED with some trepidation.
Don’t get me wrong, I’m all about the tech, and as far as being a cinematographer is concerned, I find myself falling more on the technical side of the fence than the artistic side (probably a 65–35 split).
I knew that in order to shoot a paid job on this camera system, I would have to invest some serious time into learning enough about it.
Aside from the learning, I needed to be convinced that I could actually get a better image from a RED camera than I could from an ARRI, else why bother?
You know what that means. Yep. Testing.
Over a couple of months, whenever I had time between projects, I would head down to Video Europe in Bristol and spend some time setting up whichever RED camera they had in stock at the time and shooting some tests.
I tested both the Red Weapon CF 6K Dragon, as well as the Red Weapon 8K S35 Helium.


The main things I was looking out for when shooting tests were dynamic range, resolution, sensitivity and colour rendition, as well as the general usability and features of the cameras.
From the tests I ran, I came to the following conclusions:
Sensors
RED have developed quite a few sensors over the years, the most recent iterations being the Dragon (6K), Helium (8K) and Monstro (8K VV). Aside from the Monstro and its rather large full-frame sensor, both of RED’s other sensors are approximately Super 35mm.
The Dragon is marginally bigger, despite its lower resolution.
This is a really practical move, as the majority of cinema glass available to rent covers an S35 area. What gives RED the advantage over a lot of other cinema cameras in market (apart from ARRI) is the ability to shoot a cropped portion of the sensor.
That’s right—you can shoot with anamorphic lenses.
Dynamic Range
I’m all too familiar with camera manufacturers claiming that their cameras theoretically have 14+ stops of dynamic range, but in practice have something closer to ten.
RED are not one of those manufacturers.
I ran tests whereby I would both over and underexpose my subject by up to five stops and pull it back in the grade, and every time with both the Helium and the Dragon I was pleasantly surprised by how much data came back.
Interestingly this was especially prominent in the highlights—modern sensors do seem to be geared towards prioritising highlight detail.
What was also nice was how much RED’s OLPFs (Optical Low Pass Filters) have developed since earlier models. After looking at both the ‘Standard’ and ‘Skintone/Highlight’ versions, both provided an adequately nice highlight roll off (more so on the latter).
Resolution & Sensitivity
This is obviously one of RED’s key marketing tools.
Personally, I like to think that I’d prioritise image quality over sheer pixel count. You can have as many pixels as you like, but if your pixels are crap, you aren’t going to get a cinematic image.
If you increase the amount of pixels, but keep the camera sensor the same physical size, you run the risk of diminishing the sensitivity of the camera, due to each individual photosite being smaller.
RED claim to overcome this problem with really, really high quality pixels.
Their sensors, both 6K and 8K respectively, have native ISOs of between 640 and 800, and I found that this was pretty much on the money.
The Helium, regardless of its higher resolution did seem to be marginally more sensitive to light.
Colour Rendition & Colour Spaces
When you shoot on RED, you pretty much exclusively shoot RAW, so it’s the colour accuracy that’s important here, rather than the ‘look’ of the footage itself.
I really like this notion.
Having the control to capture as much information as you like with the sensor, and then using other means to manipulate the image, such as lenses, filters and colour grading, puts you firmly in the driving seat.
It gives you the confidence that no matter what you throw at it, the sensor will capture everything it can.
Any colour profile or space that you choose to shoot with is merely tagged into the metadata to be later recalled in the grade.
Until very recently, there were numerous combinations of colour spaces and gammas to choose from, however RED are constantly updating their in-camera looks, and as I write this they are debuting their new Image Processing Pipeline [IPP2].
This promises to unify the colour spaces and gammas and provide somewhat of a new, future-proof, HDR-ready standard for RED cinema camera workflows.
Releasing an entirely new system just as I learnt about the old one? Classic RED.
I like to develop my own project specific LUTs for bigger projects, so I needed to choose a starting colour space and gamma.
Since I’m used to grading LOG footage, and wanted to capture the most dynamic range and colour information as a starting point, to I decided to go for redwidegamutRGB and Redlogfilm.
From here I was able to build a LUT and upload it onto the camera. Again, this doesn’t get baked in.
RAW Compression & ProRes Proxies
I won’t lie, I wasn’t the first and I won’t be the last to fall into the great anti-REDRAW propaganda trap.
One of the main reasons I’d stayed away from RED for so long was for the fear of the mountains of data I was sure that I’d accumulate, even on small shoots. Even when shooting on ARRI, I would opt for ProRes 4444XQ to save on file sizes.
Originally, I had planned on shooting this project on Alexa Mini for this reason.
As the weeks went by and my understanding of the RED system improved, I was more and more tempted by the prospect of making the jump, but the ol’ data gatekeeper remained.
I needed to find out if the cautionary tales were true. If I’m honest I’d not even looked up the data rate of ARRI ProRes!
As is natural in situations like this, I dove into some reading. Prepare yourself for a spreadsheet screenshot.

Holy shit, I couldn’t believe it.
I could shoot REDRAW 6K at the same time as a 2K 422LT proxy (yeah, the DMSC2 line of RED brains can shoot simultaneous ProRes Proxies, cool, right?) and over 180 minutes the total file size would still be smaller than if I had shot on Arri 2.8K 4444XQ ProRes.
What the shit?! I was also shocked at just how massive ARRIRAW files are, especially given its 2.8K resolution.
Julian from Video Europe revelled in my amazement, mocking my open mouthed expression upon comparing my findings.
Once I’d closed my mouth he went on to explain that the way RED is able to keep its file sizes down is with something called wavelet compression.
WARNING: Unless you have at least a degree in maths (which I don’t), don’t go reading into this too much, you’ll only end up more confused than you were to start with*. The best explanation of how this works is currently on the RED website, and explained as:
(in regards to the file sizes versus quality)… “This efficiency is achieved in part because wavelet compression encodes image features at different scales separately.
A wavelet file therefore contains a low-resolution base image, plus progressively higher resolution components — all the way up to the final full-resolution image, which is the net combination of all these”
Whilst you can choose to shoot at a 2:1 compression and overload your data storage solution, tests have shown that even up to 13:1 is unnoticeably different upon first review.
I chose to go for 5:1, as this seemed to be a good compromise between compression and quality.
*If you are a sucker for punishment, click to learn more about wavelet compression, and don’t say I didn’t warn you.
Monitoring & Tools
Aside from a light meter, the monitoring options on a camera are all you have to ensure that what you’re seeing on set with your eyes is what you’re capturing with the camera sensor.
It’s all well and good having a sensor capable of incredible dynamic range and resolution, but if you can’t accurately measure the qualities of your image—be it the luminance, contrast or colour—you may as well be throwing that information in the bin.
As with all cameras, when it comes to on-board monitors, you don’t tend to find one that has every single feature and function that you’d like.
This is why I tend to opt for a secondary external monitor like an Atomos Shogun or Odyssey 7Q+. RED is no different. However, that’s not to say that they don’t do some things really bloody well.

Let’s start with the displays themselves:
1. DSMC2 RED EVF (OLED)
This little guy is the tits. It’s absolutely pin sharp due to its HD resolution, has 30bit colour depth and boasts a 10,000:1 contrast ratio.
Out of the 3 monitors that I used, this was my favourite. I’m pleased that they changed the name from “Bomb EVF”.
I’m not sure whether RED were initially particularly aware of how incredibly inappropriate that name would be for airport travel…
2. DSMC2 RED TOUCH 4.7″ & 7″ LCD
These two displays were great. I would give the 4.7″ a decent 7/10, however it was my least favourite of the 3 monitors I used.
Both displays have 8bit colour, and similar pixel densities (315dpi vs 323dpi) and brightness (400cd/m2 vs 350 cd/m2), however the 4.7″ is only 720p, as opposed to the full HD resolution of the 7″.
Due to the rather fiddly nature of RED’s menu system, I found that the 7″ was much more user friendly, just because the buttons were bigger.
I’m afraid size does really matter. They both attach through the RED Brain system directly to the camera body, which is great for avoiding excess cables.

I don’t want to start with a grumble, but whoever decided to exclude a waveform from RED’s exposure tools is permanently removed from my Christmas card list.
Instead, RED opted for a histogram goal post, traffic light…thing. As you over expose, the right goalpost fills up with red, and as you under expose, the left fills with red.
The traffic light system works by either illuminating a red, green or blue circle if any of the channels have clipped. While useful, it just doesn’t seem as precise as using an RGB waveform, which is disappointing given RED’s premium place in the market.
With the exception of this pretty huge annoyance, the exposure tools included in RED’s display system are comprehensive. Peaking, False Colour, Zebras are amongst a plethora of tools at your disposal.
You also have the option to import custom 3D LUTs onto the camera itself and display those through both the EVF and LCD screen.
In fact, you can forward the LUT through any port you like really. I tended to use the EVF without a LUT and use my LCD display with it, so that I could compare the two, which was helpful considering my lack of waveform. I’m not bitter.
Audio
I’m no audio expert, so I’ll keep this brief. Having an internal scratch microphone was really useful when slating for sync sound.
You can also opt for the studio module and have XLR inputs if you like. I didn’t use these, but they seem like a good idea. Definitely more useful than the Alexa Mini.

Menu System
As of writing this post the latest firmware for the Weapon range is 7.0.0.
I can only write about my experiences with this version, although I can almost promise that it will have changed by the time this is published.
From my experience, I’d say that the RED menu system falls somewhere between the Sony and ARRI system when it comes to ease of use.
I find Sony’s to be a bit of a mess, especially on the FS7, which seems to get confused between being a cinema and broadcast camera.
ARRI’s is extremely simple and straightforward, but RED has the advantage of being touch screen.
There is a lot of information displayed at once, and a lot of settings to choose from.
When it comes to navigating the menus themselves, there is some learning to be done, and I’d recommend either spending a day with the camera to familiarise, or finding a good emulator online to have a go at it.
A lot of the settings will be familiar, such as ISO, white balance, and aperture, however the placement of certain recording modes and colour settings will be unfamiliar to ARRI or Sony users.
To be honest, I find ARRI’s menu to be the simplest in the industry. All others are secondary and it’s just a case of getting to know them.
When I moved over the Sony from Canon it took me some time to get my head around that system.
My Canon friends still moan when asked to shoot Sony, but once you’ve spent the time to get used to it, you’ll be fine.

2. The Shoot
As if taking REDs on a paid job for the first time wasn’t nerve racking enough, for extra jeopardy, this shoot was a live session.
Multiple REDs all shooting at the same time, all needing to perform reliably and consistently. Here are my findings from the day’s shoot.


Reliability
The main concerns I had when it came to the day of shooting were largely rooted in the camera’s reliability.
Ever since the RED ONE was released, RED user forums and word of mouth have supplied me with plenty of hilarious (and sometimes terrifying) stories of reliability issues with RED cameras.
From overheating to coloured noise patterns, to the cameras simply just deciding not to turn on at all.
Coming from a background of using ARRI cameras that seem to be able to handle an endless amount of abuse without missing a beat (they can even take being fully submerged in snow, oops!), I was pretty apprehensive about choosing to shoot with a less than bulletproof system.
I have to say, and I don’t know if I was just one of the lucky ones, but all of the cameras that we used on the shoot performed perfectly.
I mean, we were in a room that had a constant, mild temperature, and we did take precautions and advice on how to get the best performance from the units.
The main advice I’d taken was waiting for them to reach the correct temperature before rolling and keeping the battery voltages at a healthy level at all times.
The only issue I encountered was related to the user interface when under-slinging the camera on the Sk8plate, whereby the image would flip automatically but the UI wouldn’t, or I could manually flip the image but the UI wouldn’t follow.
I don’t even think that story warrants a forum thread.
Maybe RED have finally cracked reliability with the new DSMC2 Brains, who knows. I’m not complaining!
Ergonomics & Form Factor
As this was a live session, all of the cameras were either tripod mounted, or mounted to Sk8Plates on O’Connor heads.
It was really nice to be able to tightly pack the cameras and operators close together, which I don’t think we could of done if we were using Amira’s or Alexa SXT’s.
We were using quite small, light lenses, so balancing the cameras on their heads was a doddle.
I do really like how small and modular the cameras are.
Being able to adjust and modify the unit to suit your needs is an incredibly useful tool to have at your disposal as a filmmaker, and RED have nailed it.
I was reading somewhere the other day that without the RED Epic, there would be no Alexa Mini, and having used a Dragon, I can certainly see where they were coming from.
We opted to use the Cinema Package for all of our cameras, utilising both the EVF and top monitors.
Top tip, and something I always try and do with my AC in prep: if you have a large preston bag or similar, build your cameras as completely as possible the day before, so that you can almost just pull them out of the bag and get going.
There are far too many things to be worrying about on set already, without having to go full mechano on your rig.
The only downside to this form-factor is that when you go shoulder mounted with a big lens, you’ll struggle to get the rig balanced without adding some serious weights to the back.
I can see why David Fincher had RED make him his own Xenomorph with a bigger rear end.

Exposing & Exposure Tools
As I mentioned earlier, the main exposure tool that RED have introduced is the goalpost system.
As my beloved waveform wasn’t an option, I used a TV Logic set monitor equipped with waveform feed to help me when setting up the lighting, alongside my light meter.
Once I’d done a pre-light and was comfortable with my waveform, we all moved over to just looking at the in-camera tools.
I thought I’d give the goalpost system the benefit of the doubt and see what it was all about. I gave it everything, and all it gave me was crippling underexposure anxiety.
I was shooting a moody, low-key session, so I wasn’t expecting a healthy histogram, but even still, my red left goalpost was 75% full, even though my subject was exposed correctly.
I must have gone back to check the waveform about five times just to be confident.
I was using the Skintone/Highlight OLPF as I really wanted to create soft skin.
A caveat of this decision is that, from my experience, it lowers the sensitivity of the camera from 640 ISO to about 320 ISO.
The LUT that I’d developed worked on a 2-stop pulldown as I was expecting to be overexposing to make the most of the OLPF, however I ended up boosting the ISO in camera to 1600 to feel comfortable that I wasn’t going to lose my shadow data.
As it turned out, the the camera was incredible at capturing shadow information. I shot in 5:1 RAW, so when we got into the edit I realised that I had only needed to expose at 800 ISO to retain my shadow detail.


3. Post Production
Once we got the rushes back to the studio, it was evident that all of the trouble RED had gone to over the years to smooth out their post production workflow had paid dividends.
Although we shot in 6K RAW, we were also able to shoot a 2K ProRes Proxy to use in the offline edit so we could do a multicam edit in Premiere Pro quickly and easily.
The proxy was also already de-squeezed, and because we were working from RedWideGamut and Redlogfilm, we were able to apply the shooting LUT to the proxies for any work-in-progress exports.
The only snafu we experienced in post was when it came to sending the XML out of Premiere and re-linking with the original RAW files in Resolve.
Even though we replaced the proxies with the RAW in Premiere, everytime we would import and relink in Resolve it would find and relink the ProRes proxies, which was a bit infuriating.
Worse still was that when you shoot proxies, the camera places the proxy take inside the folder along with the RAW files, and names it the same, apart from the .mov extension.
We definitely weren’t up for manually replacing the files one by one.
Thankfully out resident post wizard Kai was on hand to dive into the XML code and make some adjustments so that the relinking process worked.
There’s no two ways about it—if you can shoot RAW, you should shoot RAW.
The amount of control you get in post isn’t even comparable to ProRes. Even ProRes 4444XQ. Being able to tune the white balance and ISO in post, as well as having fine control over things like camera noise reduction, was such a blissful experience.
The footage took to the grade like a dream. I always try and get as close to the final look as I can using contrast, colour and exposure in-camera, so I can’t say that I really pulled the footage to its limits in the grade.
Even with exposure changes, I certainly felt safe in that the footage was very robust.
What I’d say is different to working with ARRI is the sensitivity to colour.
I’m not sure if this is a resolution thing, or a sensitivity thing, a sensor thing or a RAW thing, but from my experience, RED cameras definitely pick up on differing colours of light more profoundly than ARRIs do.
Even when it comes to light that’s reflected off a surface on the fill side and bounced back subtly onto a subjects skin, you’ll see it.
For that reason I would be much more comfortable with using RED in a controlled environment, either on a set or for a feature film, rather than a documentary context, per se.
I also really like how filmic the pictures were. Using soft, vintage lenses and a skintone OLPF together certainly went a long way to achieving this, but even the camera motion and shutter looks filmic.
In my opinion, if you get it right, the difference between RED and ARRI in terms of filmic look is negligible.
Well that went on for a while longer than I expected. I don’t feel like I’m done talking about RED, but I should probably stop for now…
To swiftly sum up, I’m sold. RED, you’ve done a really good job with the latest line of cameras and sensors, and I’m sure I’ll be shooting more with them soon.
Do I think both ARRI and RED can still coexist and be useful for different projects? Yes.
Do I have a favourite? Ask me again in six months time when I’ve shot a few more projects on RED.